A business page on Facebook is a tool to showcase business in the largest social network in the world. Here you can specify the hours of work, contacts, company information, address, advertisements and much more. Next, we’ll show you how to create a business page on Facebook and set it up so that it pleases customers and serves your goals.
A few important points:
- Creating pages is free and accessible to everyone.
- There are no page limits. You can create them as many as you like, for example, for each individual store (if you have 2 or more), the main office and a separate one for the brand.
- On Facebook, each individual page can be promoted through contextual advertising, which network members will see in their feed.
Step 1: Create a Business Page
This feature is only available to Facebook registered users. If you have already created a user’s personal page, click on the “Create” icon in the upper left corner of the screen and then “Page” in the pop-up context menu.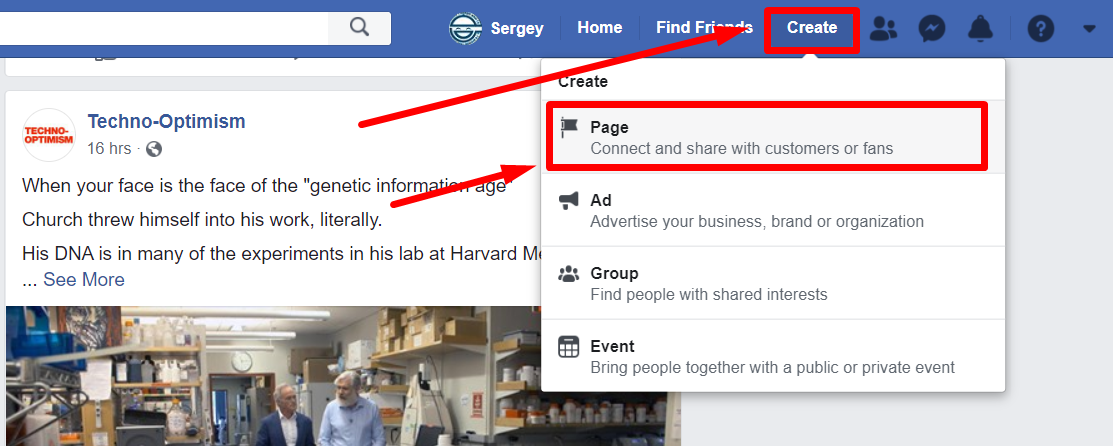
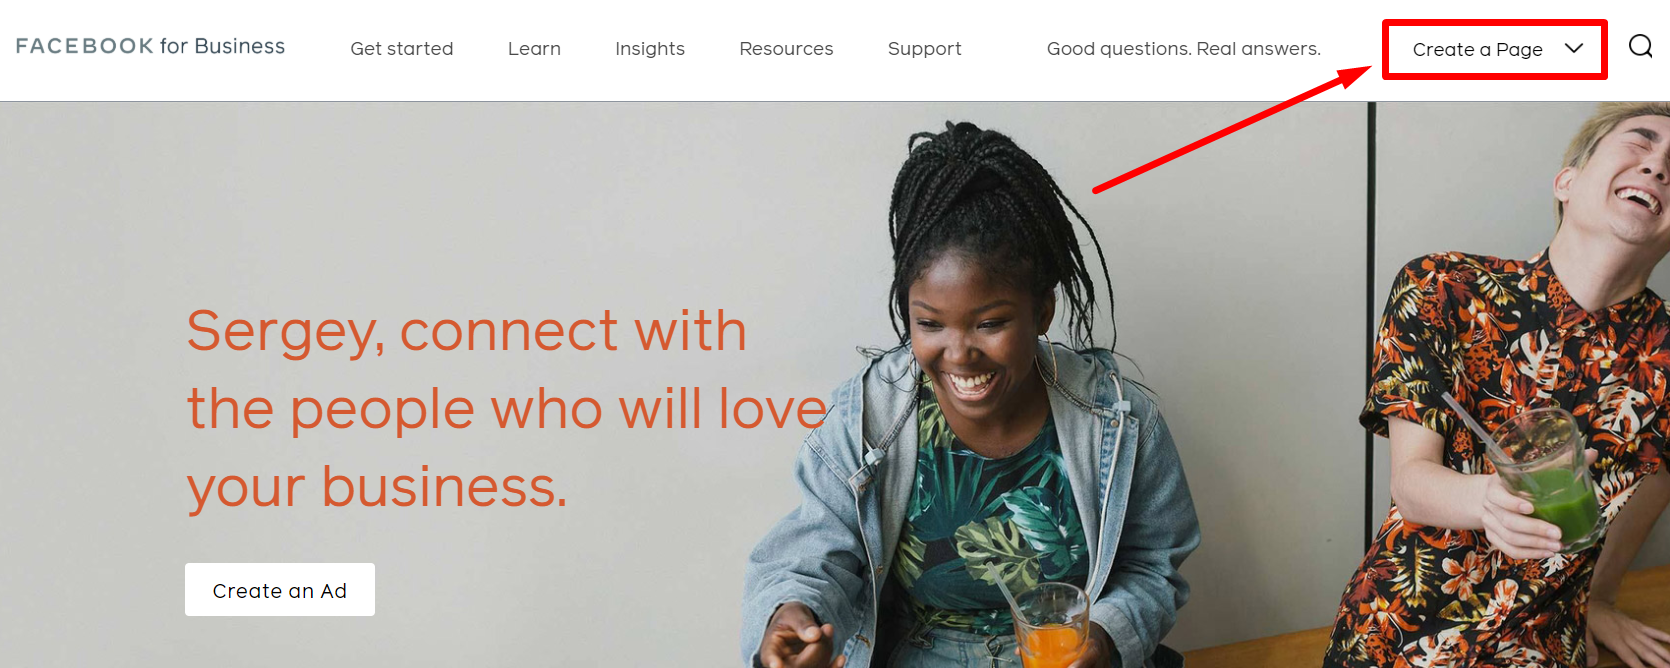
You can also create a business page by going to www.facebook.com/business and clicking on the “Create a Page” icon.
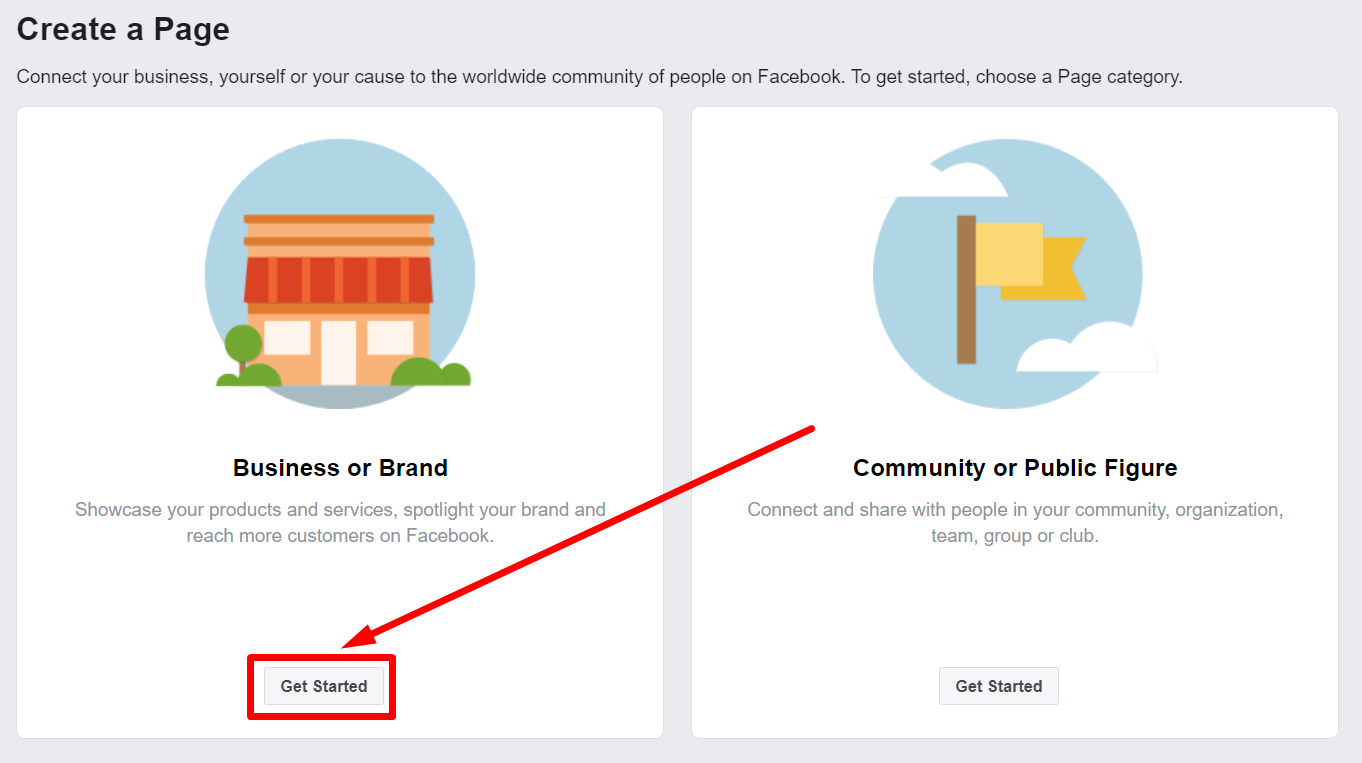
Step 2: Choose an activity profile
Next, you will be asked to indicate the profile of your activity: “Business or Brand” or “Community or Public Figure”. To do this, select "Get Started" under the image of the desired profile.
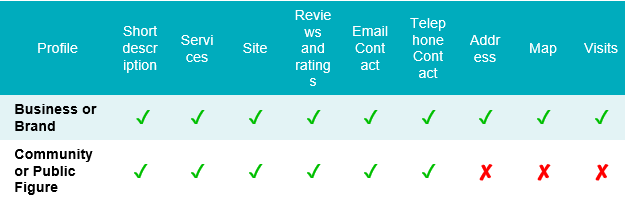
Depending on your choice, the created page will have different functions. The table indicates which profile of activity which features are available:
Step 3: Add Company Information
Name. Now in the “Page Name” field you need to enter the name of your company or brand. It is desirable that it matches the name of your real business or brand, but there are no clear rules here, so you can specify the name as you like, at least “Bond007”. Most importantly, do not use the names of other companies, brands, products, people and organizations, as this is illegal.

Business category. Next, in the "Category" field, you need to indicate what type of business you are involved in (a store, an ice cream store, retail, diving, tourism, IT development, etc.). To do this, simply enter your type of activity (keyword) and select the correct option from the pop-up list. As you understand, if you start marketing for eCommerce website you should choose the retail category.
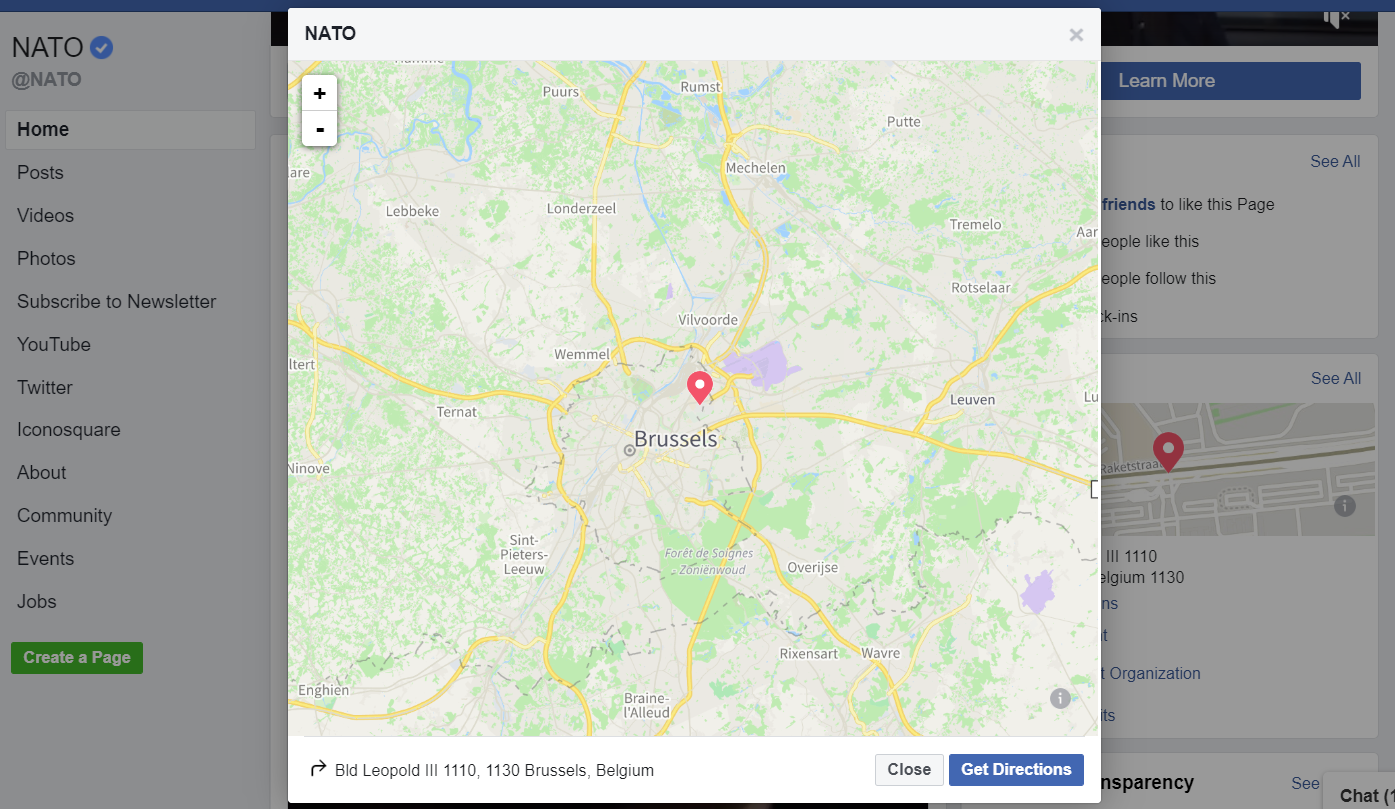
Location. After indicating the category of business, you will be asked to provide an address. This may be the point of sale (store, office, personal address if you are a small business) or the address of the main office, place of registration or headquarters in the region. The address can be hidden from visitors by checking the corresponding item (linking the page to a specific city / region will remain).

Visitors to your business page will see the specified address in the form of a map with a location marker. When you click on the map image, it will open into a full-fledged interactive map, where you can change the scale and point of inspection.
Phone. Also, if you wish, you can specify the phone number that visitors to the page will see. Usually indicate points of sale and / or support number.
When you have entered all the information, click on the “Continue” icon. After that, essentially, your Facebook business page will be created. Congratulations! The next steps are personalization and customization.
All information entered in this step can be changed.
Step 4: Download the logo and cover photo
Logo. Further, the system will offer to upload a photo or image that Facebook will display as the logo of your business (avatar of a business page). The size of the displayed image on the computer screen is 170 by 170 pixels, the phone - 128 by 128 pixels. It is worth considering that the logo will be displayed on Facebook ads, if you decide to use it in the future.

Keep in mind that users will see the picture in their profile, feed and messages in a circle, and you will not be able to optimize the image. This must be done in advance on third-party services: Canva, Crello, Stencil and others.

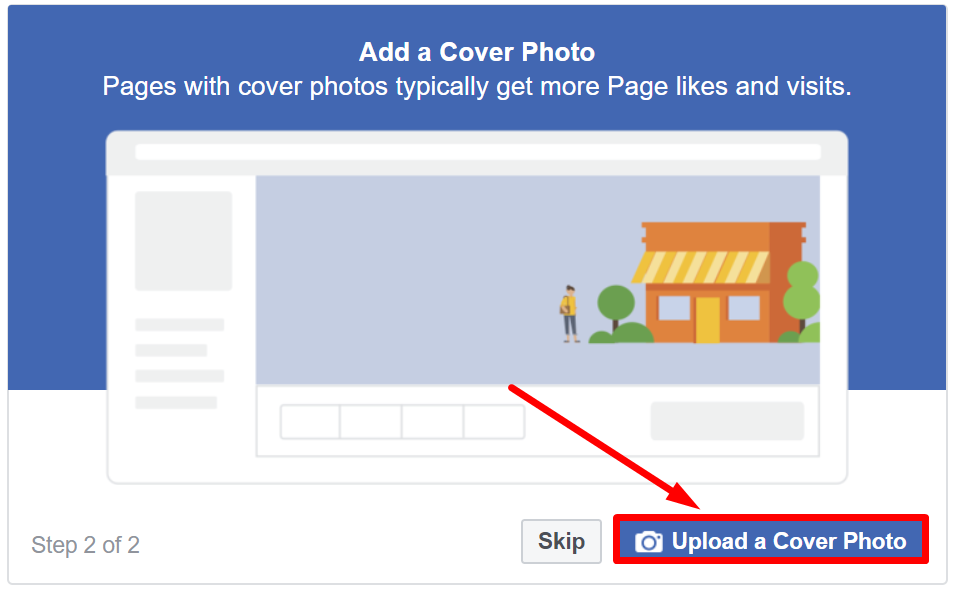
Cover. Next, the system will ask you to upload a picture for the cover of your business page. The minimum dimensions are 400 pixels wide and 150 pixels high. On computer screens, the image will be displayed with dimensions of 820 by 312 pixels, smartphones 640 by 360 pixels.
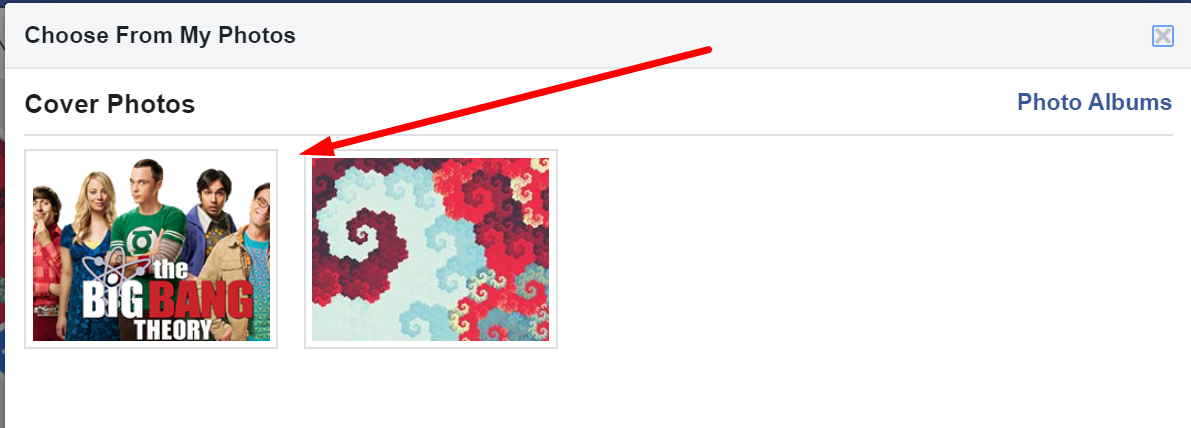
After loading the cover, a window of your business page will open, where you will see that the cover is not displayed. To fix this, click on the “Add a Cover” icon and select the option in the context menu: photos and videos from the gallery, upload photos / videos or slide shows (can be done from the ones uploaded to the gallery).

To select the desired photo in the gallery, double-click on it with the right mouse button.
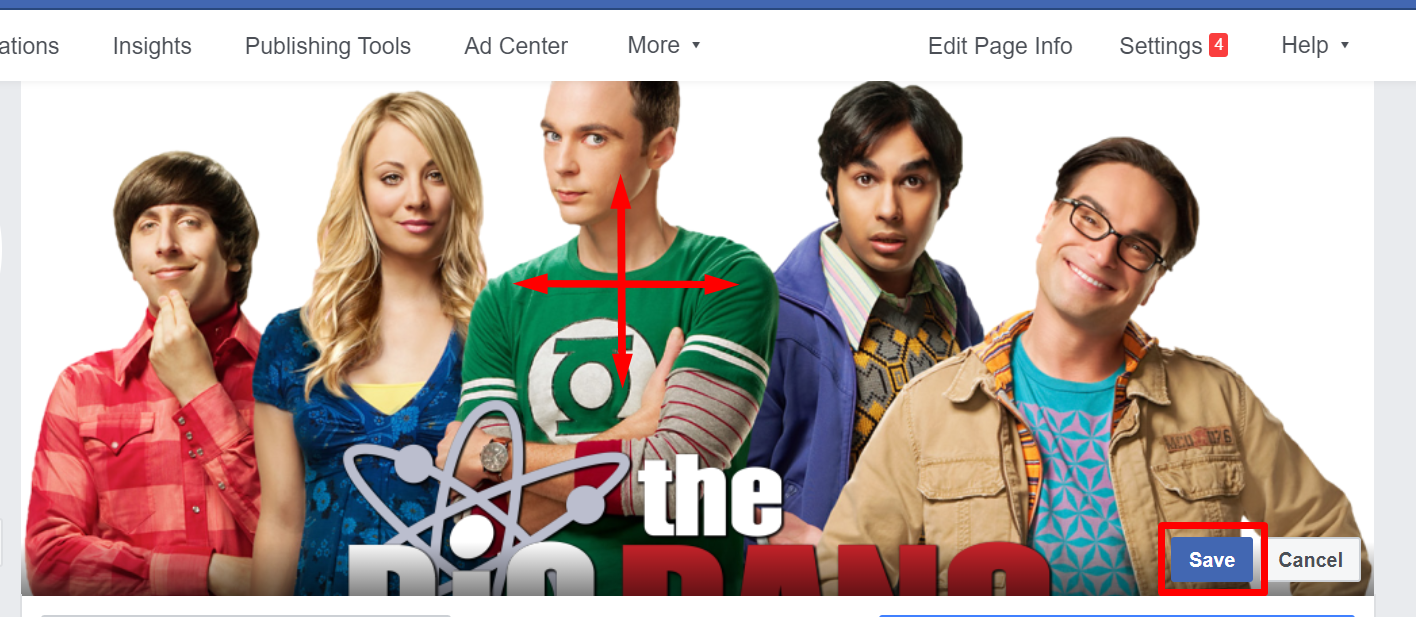
The cover image can be slightly corrected by moving left and right and up and down, but it cannot be increased or decreased. When everything is ready, click “Save”.
Logo and cover recommendations:
- For the logo, use either your brand’s picture or live photos, because, according to nngroup research, people ignore pictures from the photo stock (users don’t look at them).
- The rules for the cover are the same, but here you can also use real photos of staff, a map showing the location of the store, pictures with information about promotions, discounts, seasonal offers, etc.
- Use only high-quality, high-resolution images so that you cannot see pixels, grid edges, blur, noise, and more. Low-quality photographs subconsciously create the association “bad photo equals bad company”.
Step 5: Fill out the About Us section
It's time to provide more information about your business. To do this, go to your business page on Facebook and go to the "About" section. The icon at the bottom left of the screen under the logo.
The following things are important here:
- Our Story. A section where you can tell in detail who you are, what you do, and how long. It’s up to you how and what exactly to write about. The text size is quite large - 128 words. The first 100 characters of this text will appear in the profile of your business page in the lower right under the cover.
- General. Information about the size (displayed symbolically with 1-4 $ icons), the date of creation of the company and the type of business (sales, corporation).
- More info. A brief summary of the company (up to 255 characters), owners (mandatory for business in Austria, Germany, Switzerland and a number of other countries), advice on how to get to you, as well as a menu (if you are a restaurant).
- Team members. Option to enable the display on the page of the people (user profiles) who manage it.
- Contact information. Phone, email, website, Facebook Messenger ID and accounts on other social networks.
Step 6: customize the page
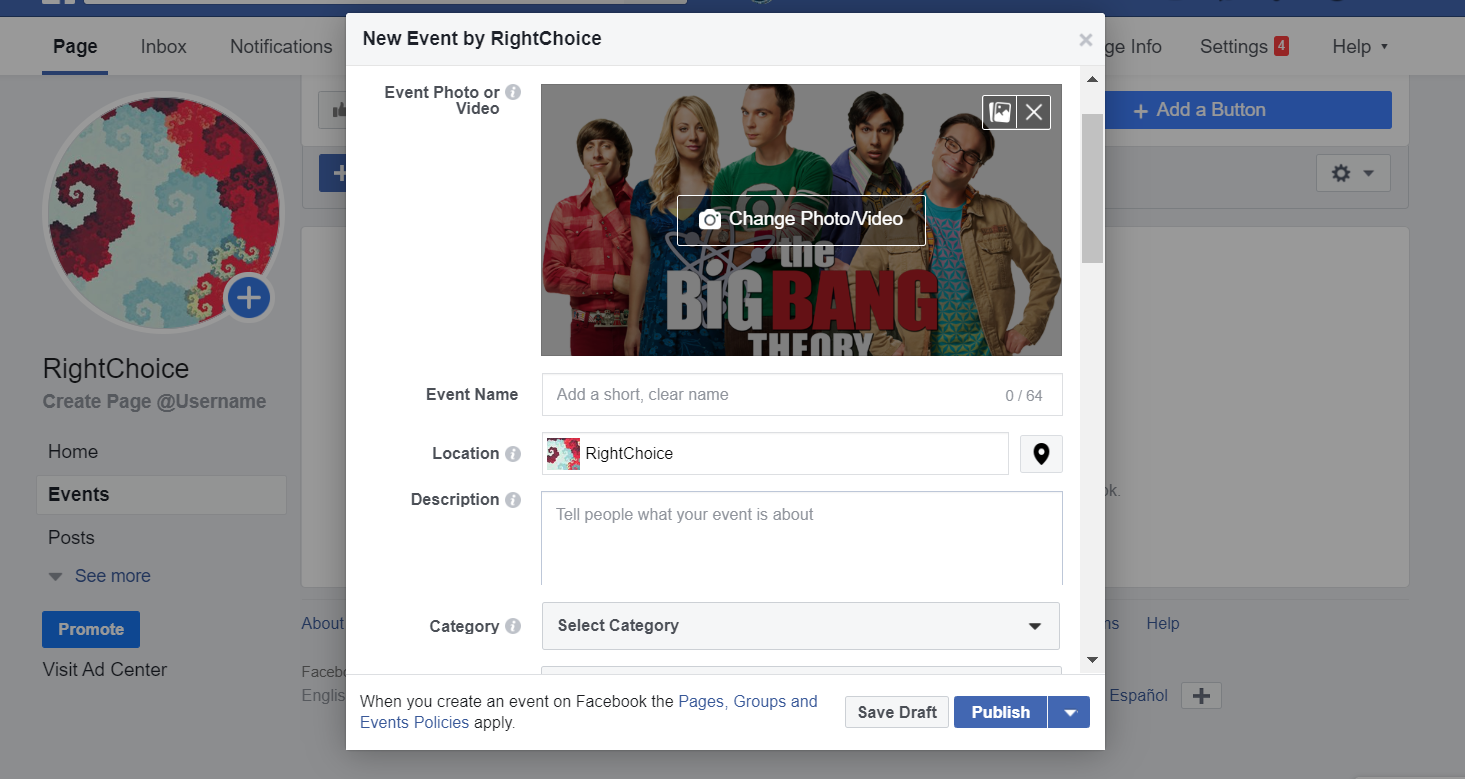
Events. In this section you can plan events that will be of interest to your customers and / or Facebook users. To do this, click on the “Events” icon on the right under the profile avatar and then on “Create Event”.
A window will open where you can give a brief description of the event and select a picture, location, date and time for it, participants, indicate the frequency, and also add the ability to register or sell tickets. When you have everything you need, click Publish.
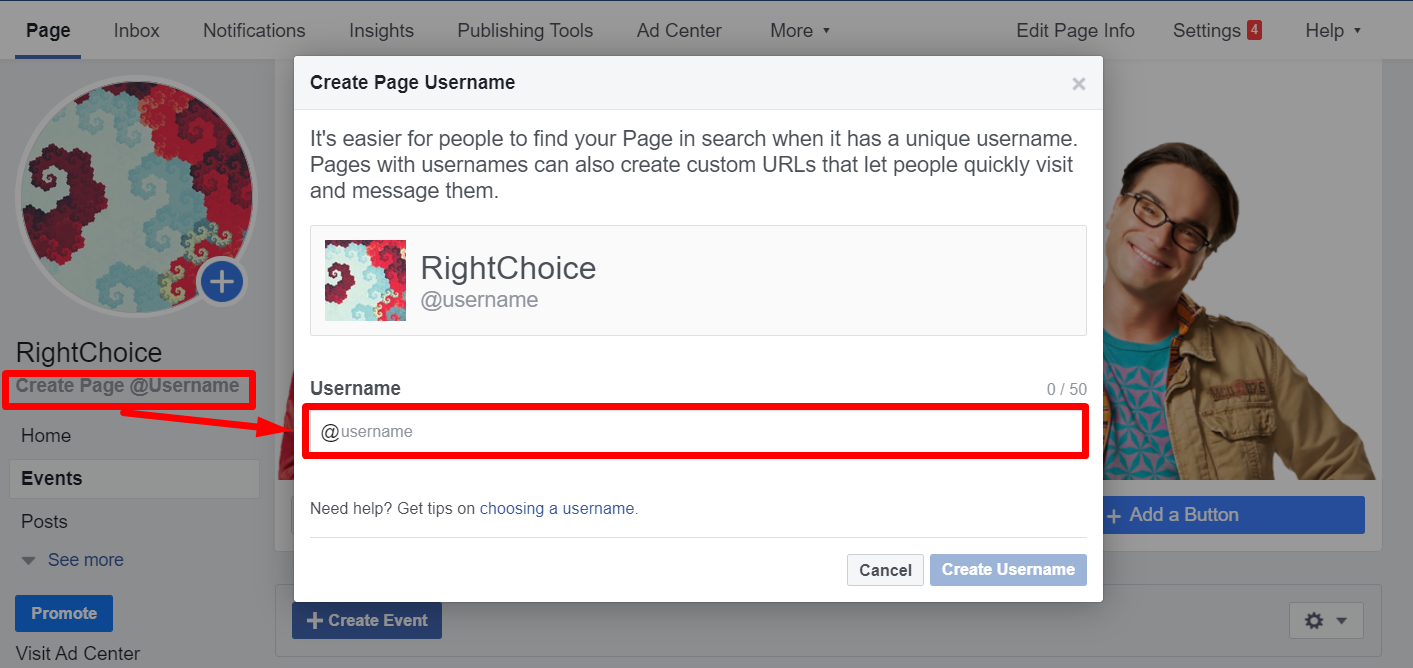
To create a unique URL, click on “Create Page @Username” immediately below the profile picture. A context window will open where you can enter a URL up to 50 characters long. Usually use the company name and / or relevant keywords. A unique URL is needed to more easily find and improve your SEO page.
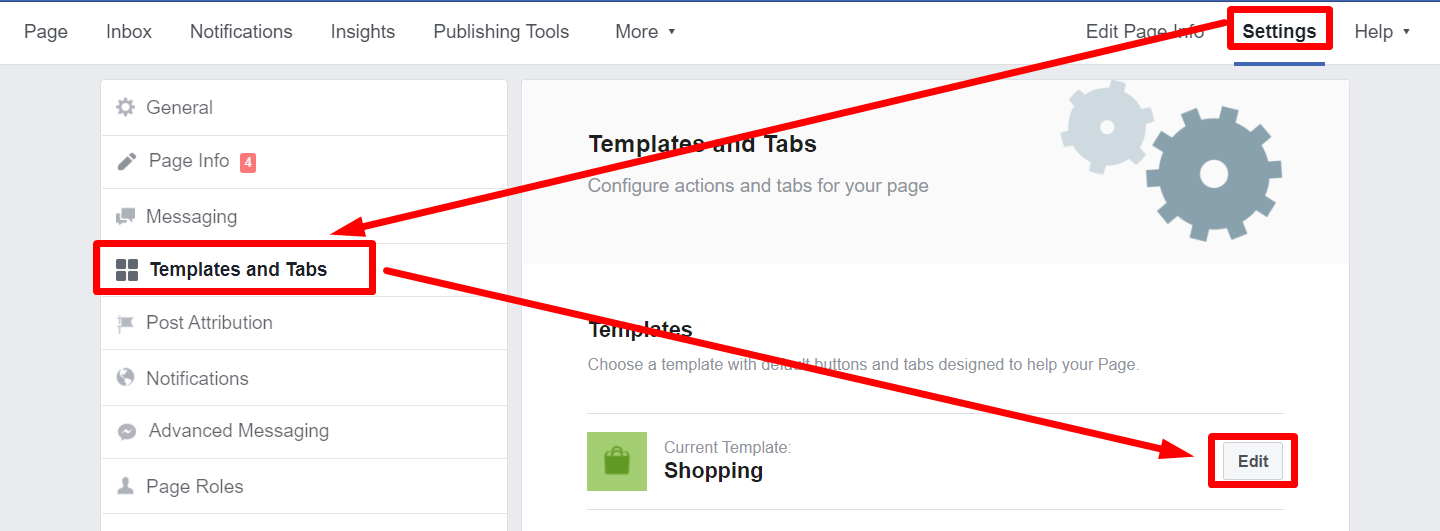
Templates and tabs. Here you can configure typical page templates, that is, its appearance and functions. Depending on the goals, these can be business, films, shopping, politics, NGOs, restaurants, services, videos, and more. To select a template, click “Settings” / “Templates and Tabs” / “Edit”.
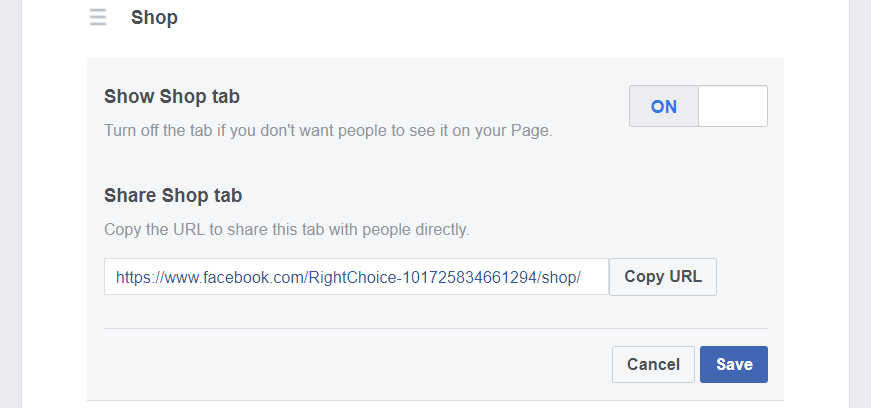
Facebook tabs are some kind of sections of a business page, such as photos, publications, reviews, groups, shop, video, community and others. With these settings, you have the opportunity to choose which tabs to place on your page, configure each of them or completely disable this function.
User roles. If you want to make marketing for a restaurant and you want to use a business page with other people, then you need to give them access to it by specifying a role for each connected user. To do this, go to "Settings" and then to "Page Roles".
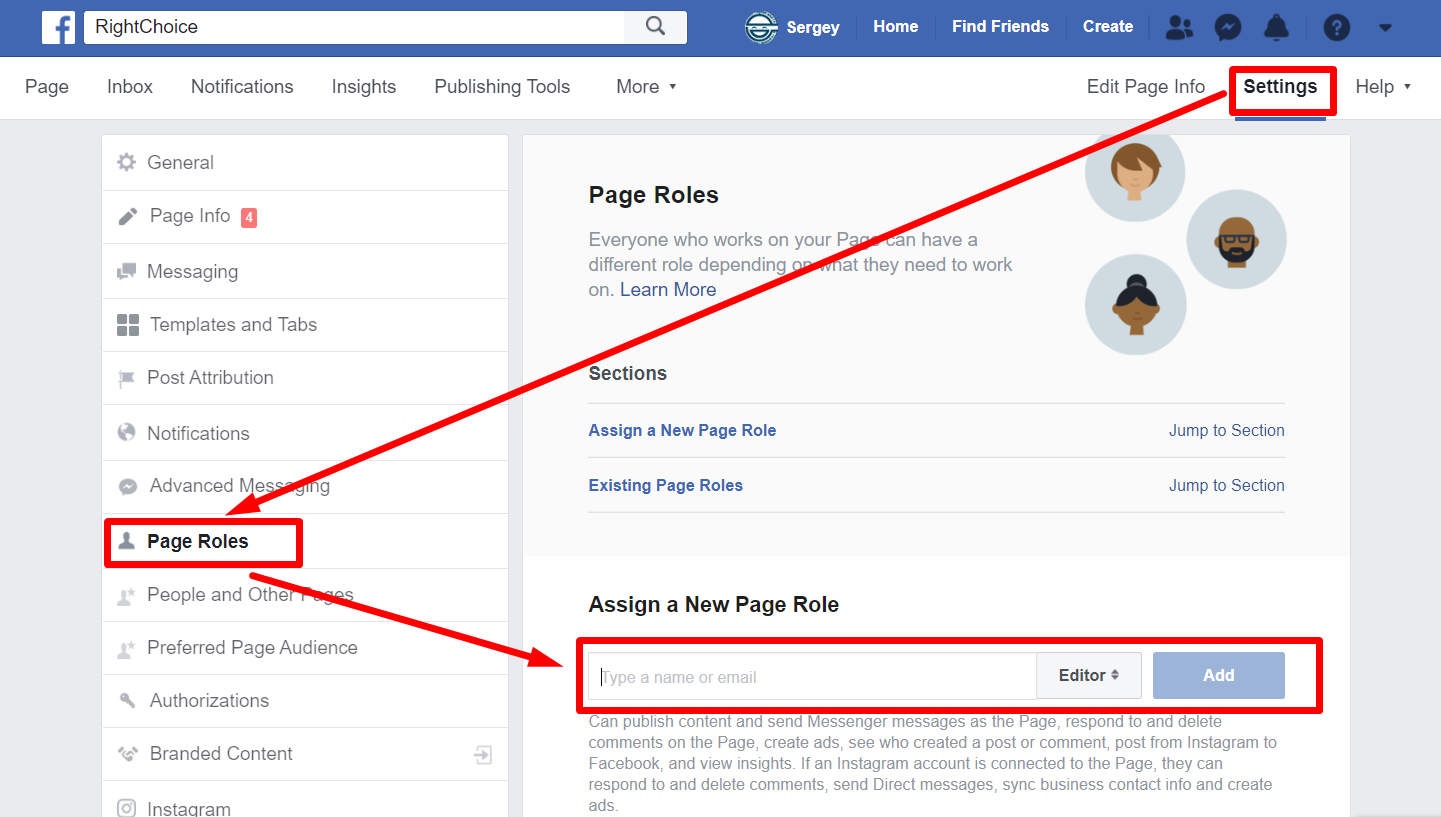
What user roles can be used:
- Admin. Full access to all settings and features. You, as the creator of the page, have the default administrator role.
- Editor. Sees authors of posts and comments. Can send messages, publish and edit posts, place ads, watch analytics (Facebook Insights).
- Moderator. Sees authors of posts and comments. Can respond to comments and delete them, send messages, create ads, watch analytics.
- Advertiser. See authors of posts and comments, can create ads and view statistics.
- Analyst. Sees the authors of posts and comments and can watch analytics.
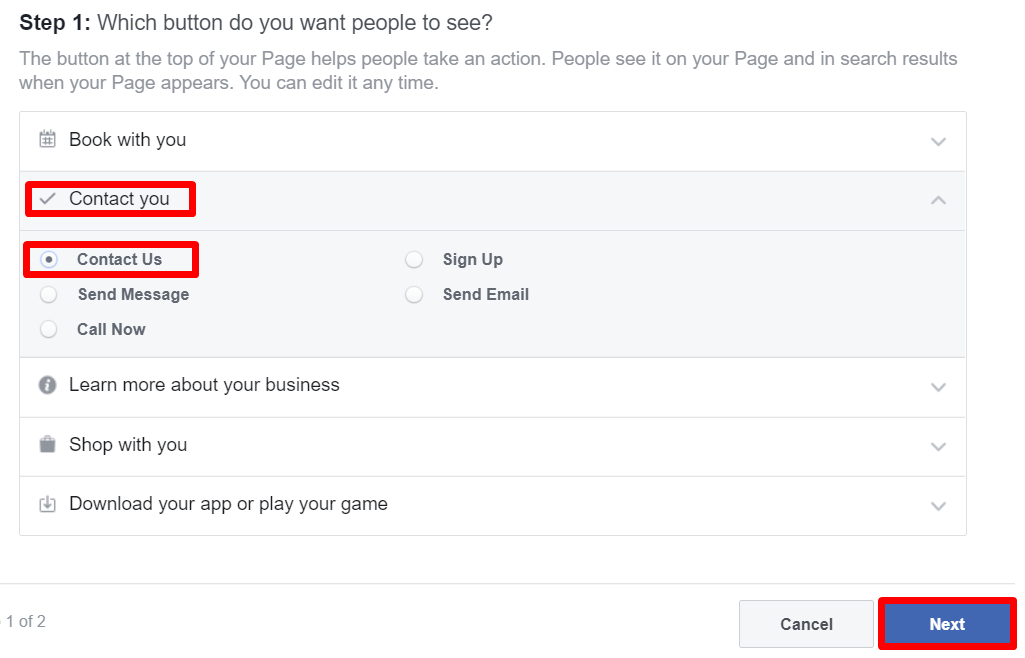
Call to action button. Facebook offers one of five options for
2the call to action button that will be displayed under the cover. To enable it, simply go to the business page and click "+ Add a Button".

In the window that opens, you need to select actions, indicate what exactly will happen when you click the button, and then click "Next".
Then you need to specify more detailed settings, for example, specify the link by which the target action is performed. Then there will be another window where you need to click "Finish".

This is how the call to action button will look in the end.

Step 7: Calling Friends
Facebook has a built-in function for inviting your friends to the created business page. To do this, click on the icon with three dots under the cover, and then “Invite friends”.
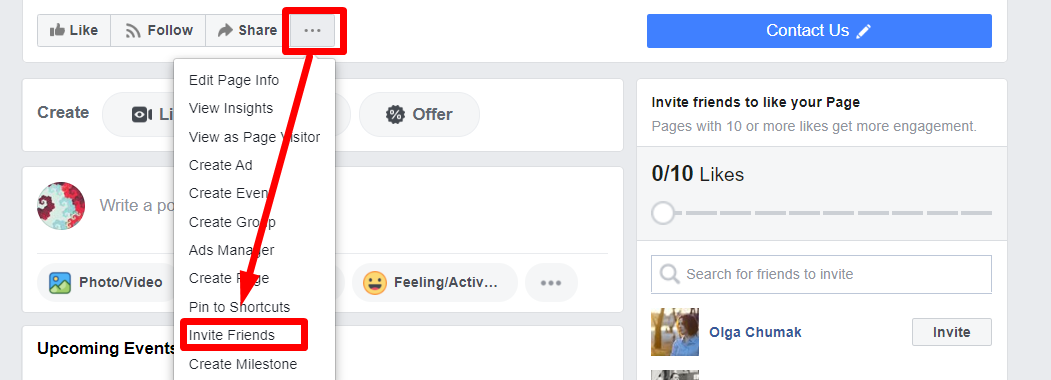
A window will open where you can choose the distribution option for all or only for individual users.
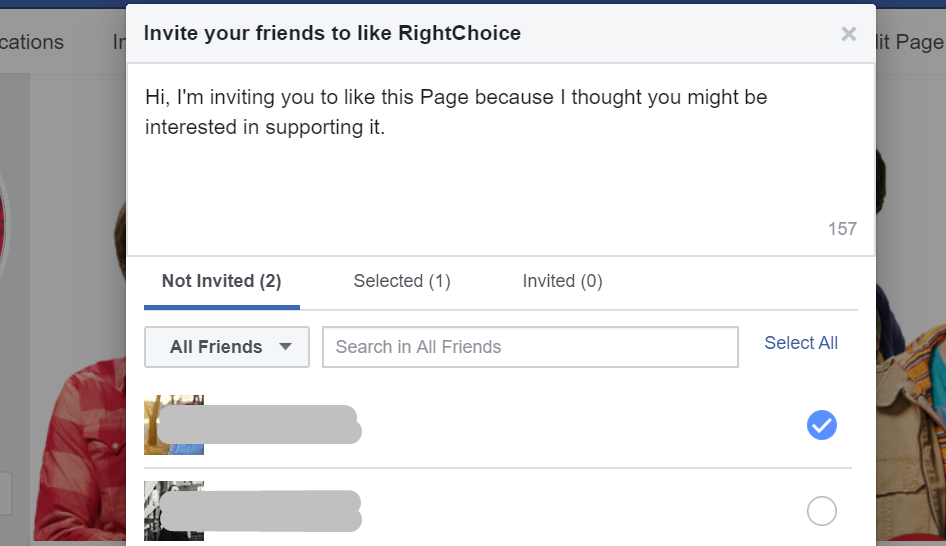
This feature is useful for collecting first views, comments and likes.
What else needs to be done
Combine a business page with your groups. To do this, go to “Settings” / “Templates and Tabs” and select “Groups” and enter the URL of your group.
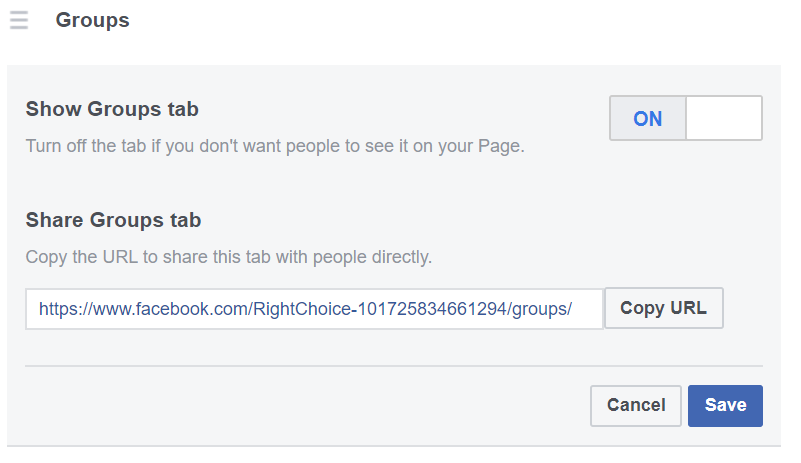
This is important, because a business page allows you to advertise, while in a group you can directly communicate with customers, conduct surveys and make live broadcasts “only for your own”. All these features are important for business.
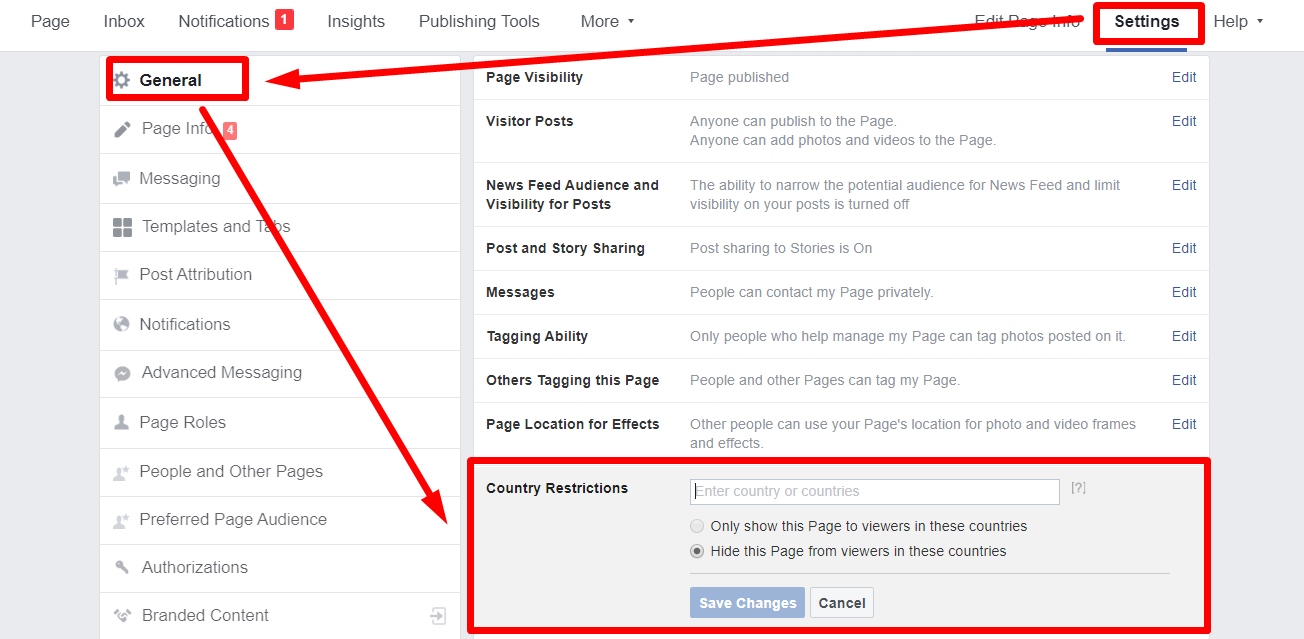
Add restrictions on the display of your page. You can ban the display of your business page to residents of certain countries and / or people of a certain age. Or expand your reach by spending money on Facebook marketing.
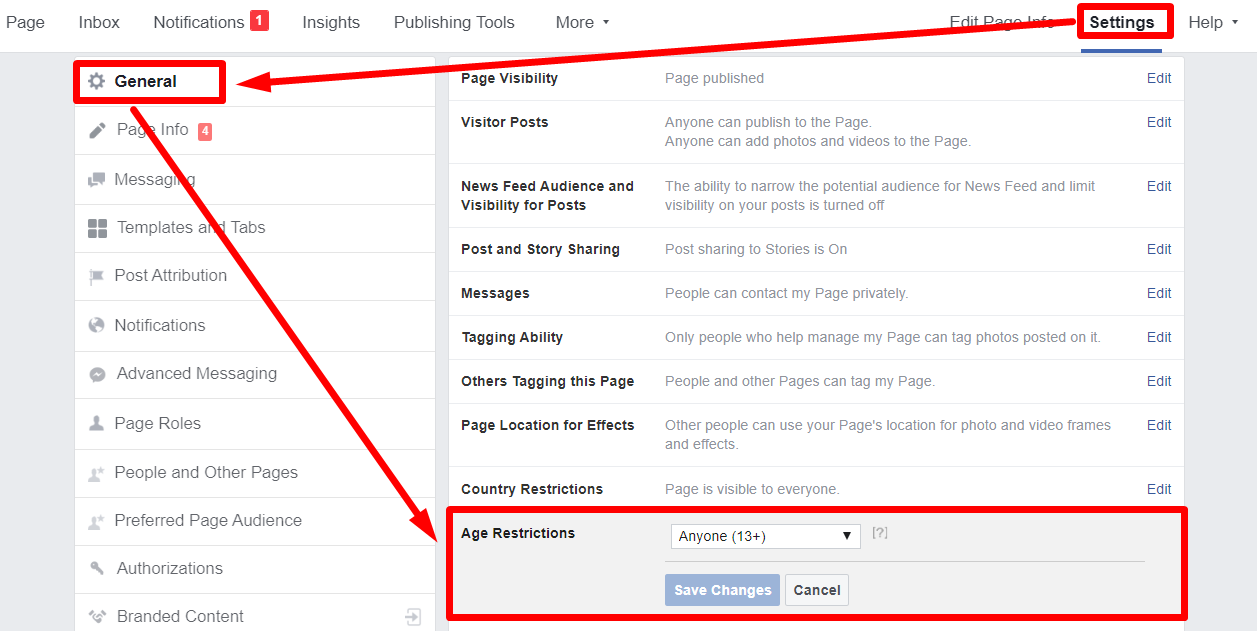
To enable country restrictions, go to “Settings” and in the “General” section find “Country Restrictions”.
Age restrictions are nearby.
Create a post with the transition to FM. In any post published on your business page, you can add a button to go to Facebook Messenger, where by default your contact will be set for communication. If you create a post with 1 photo, the system will automatically provide you with this opportunity.
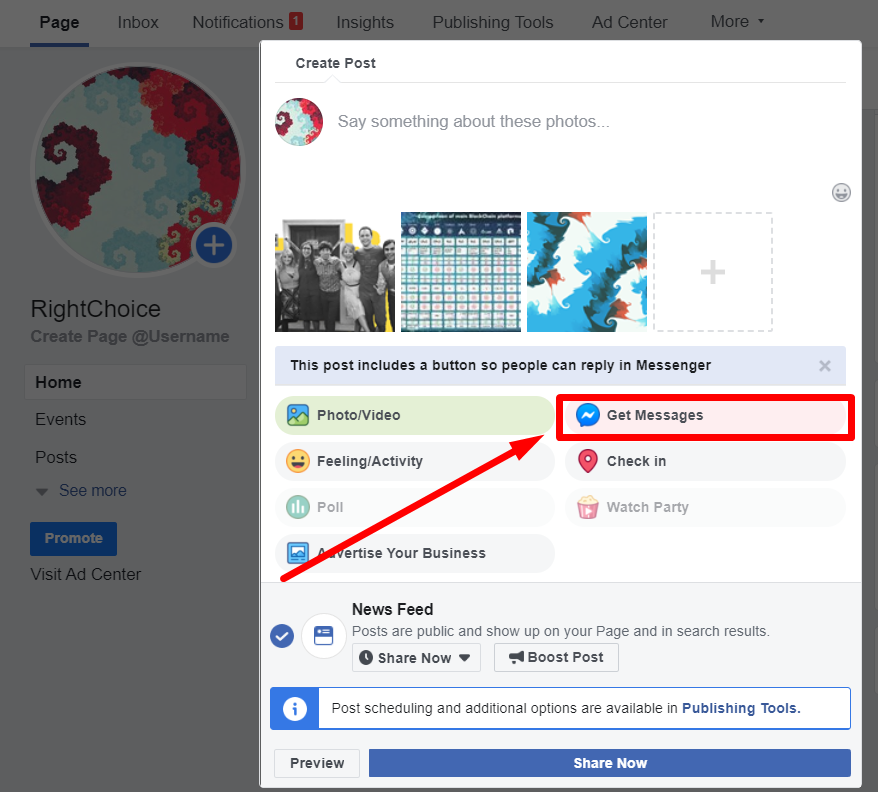
Using this transition, invite users to write to you, book a table in a restaurant, ask a question, make an appointment, order a birthday cake or other service. Create such posts, put them on promotion and collect target audience with their help.
Set up Messenger. Facebook is constantly working to expand the capabilities of their messenger, adding new features to it. In the ones you may need:
- Automatic message. You can create a template message that will be received by everyone who wrote to you in the messenger, for example, “Good afternoon. How can we help you?” or “Good afternoon. We are all on vacation, so we can answer you only after March 25.”
- Response time. Here you can set the delay for the output of the automatic response. By default, you need to set real time, that is, without delay. But sometimes another option may be required, for example, you want customers to be able to contact you by phone if you do not answer for a very long time in the messenger.
- Offline response. The ability to enable automatic greeting when you are not at the computer or phone.